
We have already shown you how You can create your own free blog/site on WordPress.com. Today we will show you how to make your free blog site look professional.

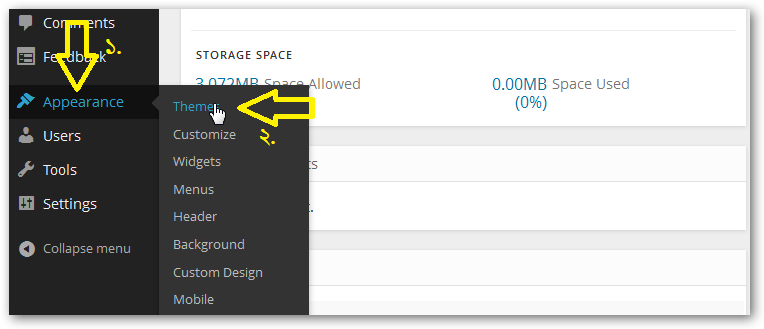
There are numerous free themes in WordPress, as well as premium themes with more features that you have to purchase to use. This tutorial will show you how to customize your blog with a free theme. If you have watched the previous tutorial, you go directly to your WordPress dashboard. There, click on Appearance > Themes from the left column.
See, there is a Manage Themes option, there is a theme given by default in WordPress, you can arrange it if you want, or see below there is another option called Available Themes, from there you can choose the theme of your choice. But this tutorial will show you how to prepare your blog with the help of Visual theme. To get this theme we will go to the search option and type visual and search:
Search by typing visual and you will get your desired visual theme. Now you can activate by clicking the Activate link and if you want you can do Live Preview. But we activated it.
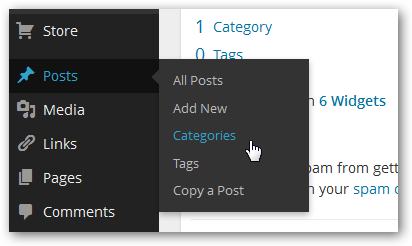
Your theme is activated, now it's time to decorate your site! What you need to do now is to make a list of the topics you want to write about and create categories. That's why you need to go to Posts > Categories in the left column (see image).
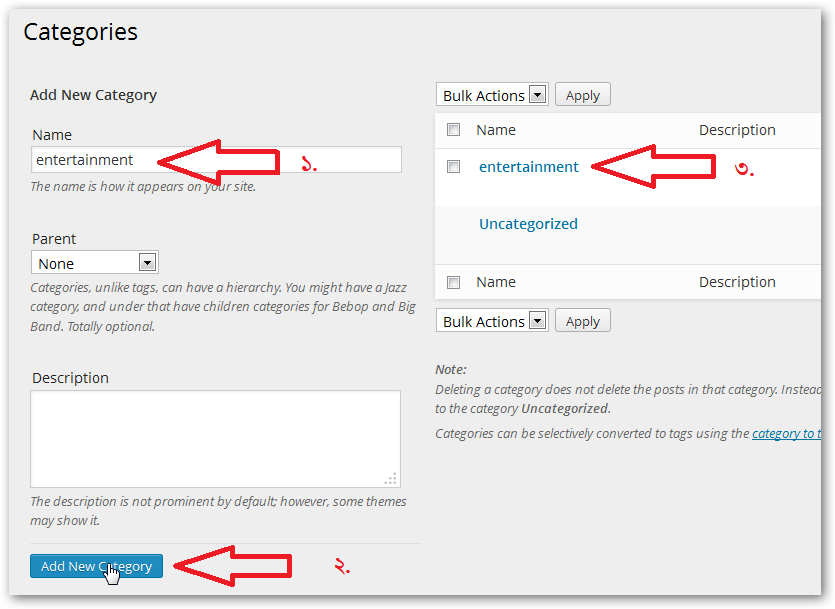
Let's say you want to write about entertainment, technology, sports and health topics on the site. To include them in Categories, write entertainment in the Name box, then press the Enter button on the keyboard, or click on Add New Category, you will see it added on the right side. Add the rest one by one in this way.
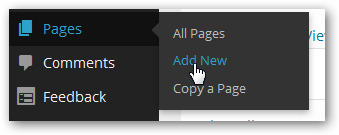
Now you need to create a contact page, so that your site visitors can contact you via mail. For this, go to Pages > Add New in the left column:
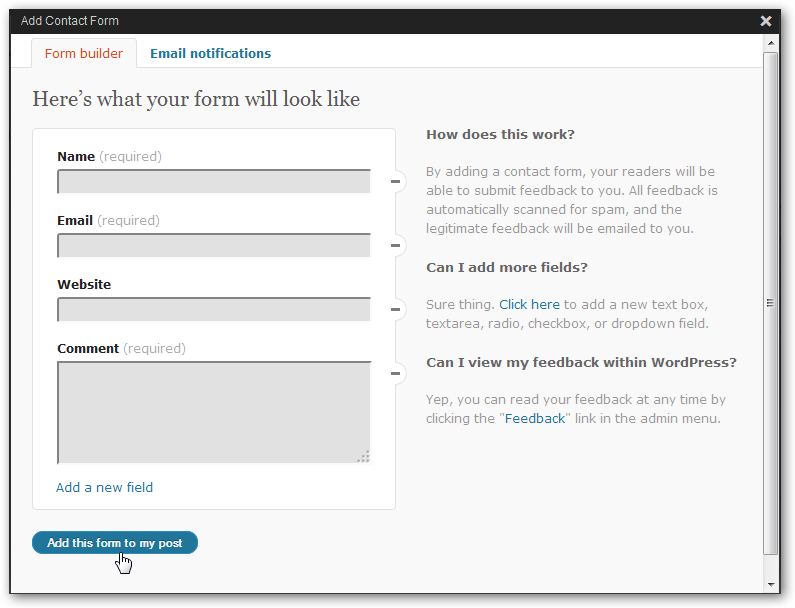
Now enter the title of the page Contact, then click on Add Contact Form.
Now click on the Add this form to my post button in the popup window that will open (see image).
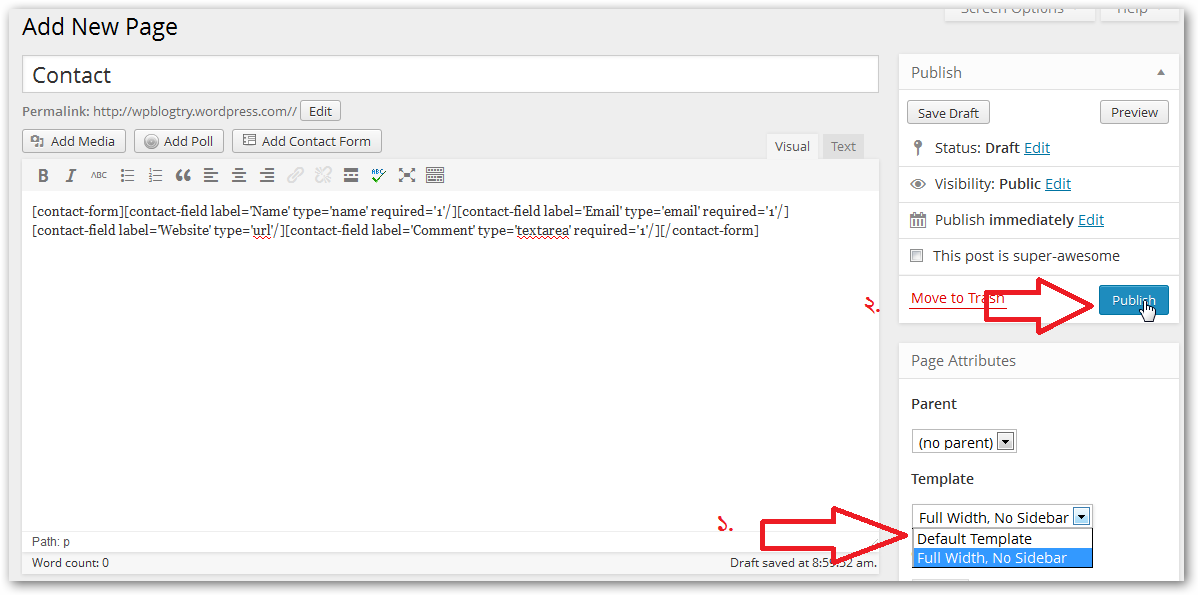
Your contact page is almost ready. Now select Full Width, No Sidebar from the dropdown menu in Template option on the right side and click on the Publish button.
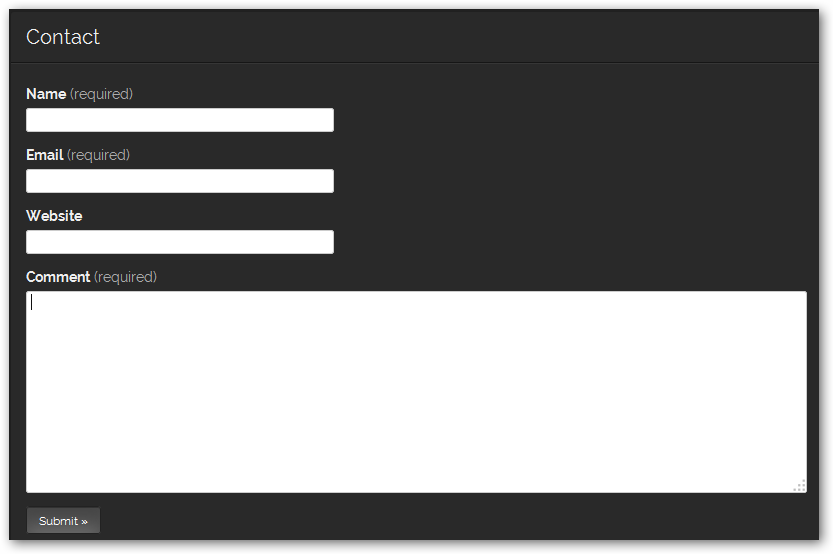
Your contact page is ready! If you want, you can click on Preview to see your created page.
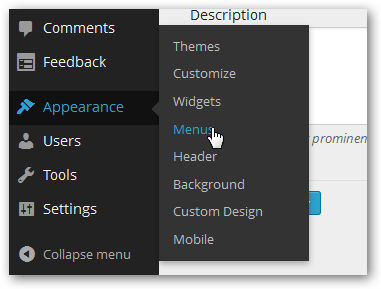
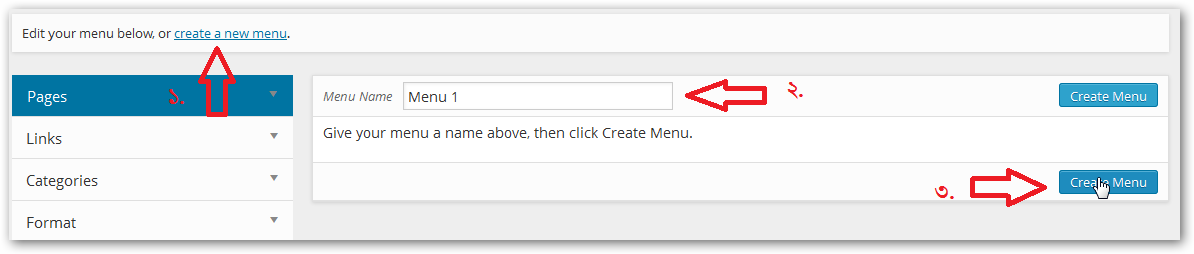
Now the categories and pages should be turned into site menus. That's why you need to go to Appearance > Menus from the left column as usual.
Here click on create a new menu and give a name in the Menu Name field (I have given Menu 1), then click on Create Menu.
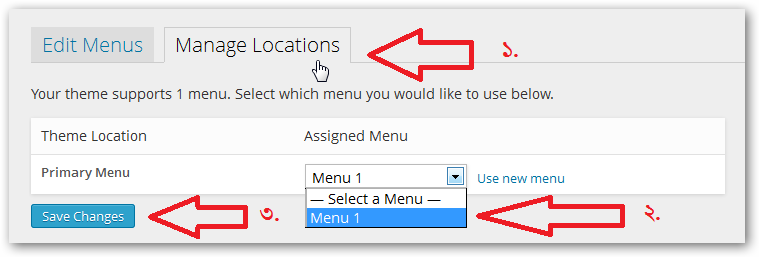
Now a tab called Manage Locations will appear, click on it. Select Menu 1 from the Primary Menu dropdown, click Save Changes
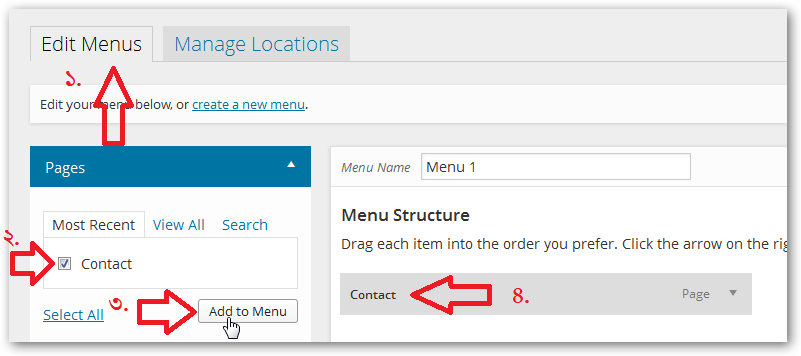
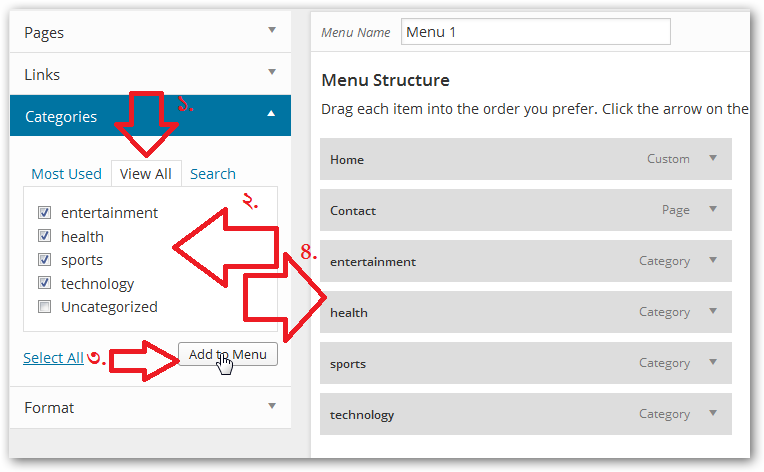
Return to the Edit Menus tab, tick Contact in the Pages box on the left. Now click on Add to Menu. Your menu will appear under Menu Structure on the right side.
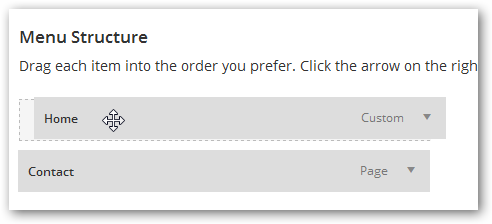
Now create Home Menu. For this, click on the Links box and enter your site address in the empty URL box, write Home in the empty Link Text box and click on Add to Menu. You will see that it has also come under the Menu Structure on the right side.
Now hold the Home menu with the mouse and drag it over Contact.
এবার Categories বক্সে ক্লিক করে View All ট্যাবে যান। সেখান থেকে আপনি যতোগুলো ক্যাটাগরি অন্তর্ভুক্ত করেছিলেন সবগুলোতে টিক চিহ্ন দিয়ে Add to Menu তে ক্লিক করুন – দেখবেন সেগুলো সব ডানপাশে Menu Structure এর নিচে চলে এসেছে।
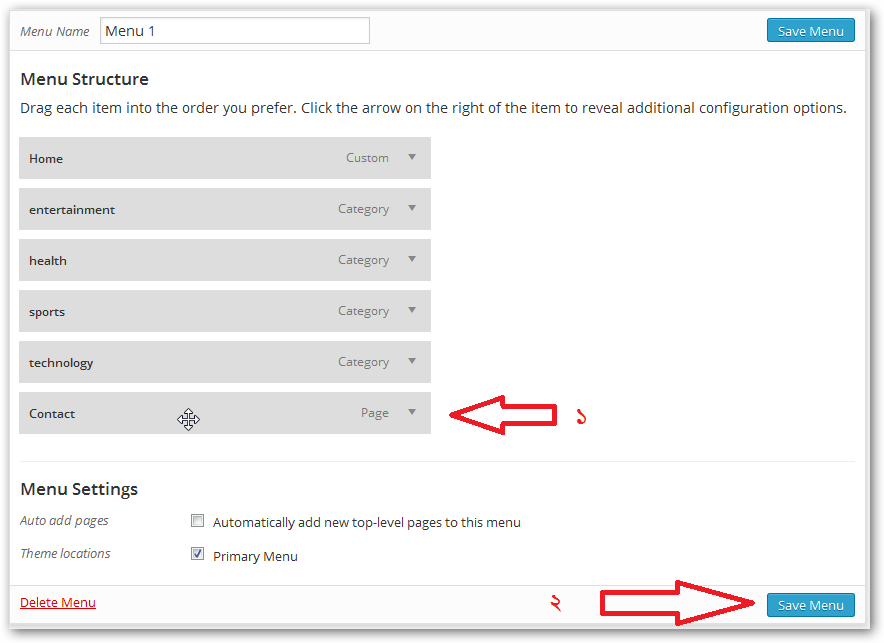
Drag the Contact menu to the bottom with the mouse and click on Save Menu.
That's it! Your menu is ready. To see, go to your main site's home page and see.
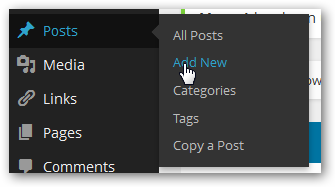
Now let's start writing on the site according to these categories. So go to Posts > Add News:
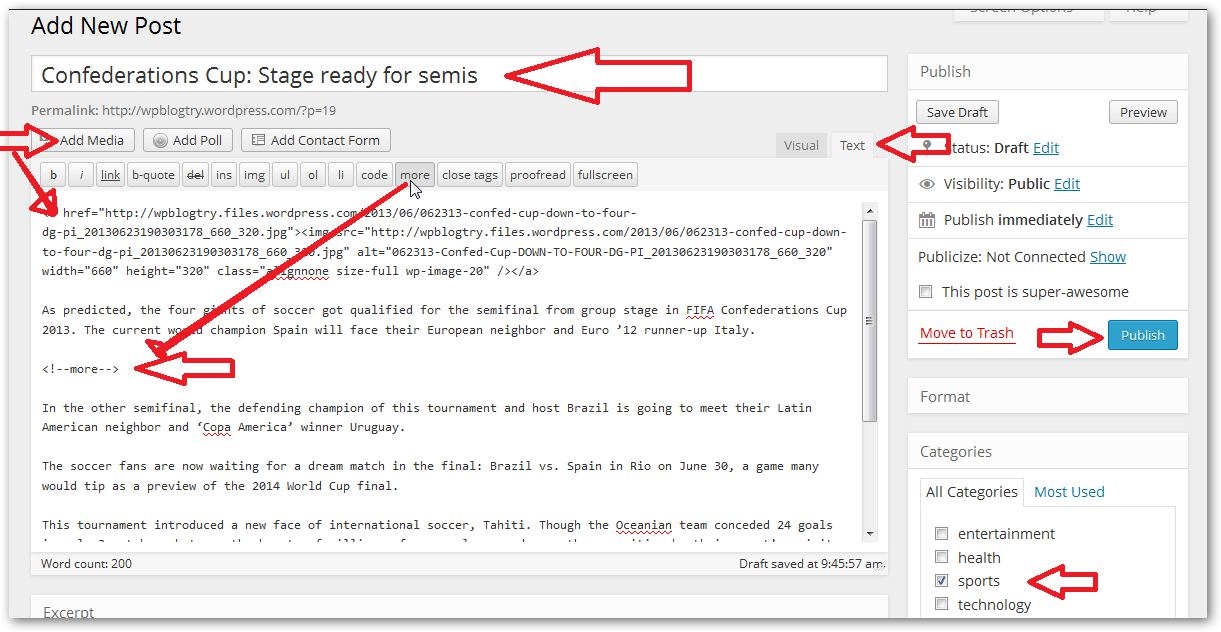
পোষ্টের শিরোনাম দিন। এবার Editor প্যানেল Visual মুড থেকে Text মুডে আনুন। Add media তে গিয়ে একটি ছবি যুক্ত করুন – এরপর এন্টার দিয়ে একটি লাইন বাদ দিয়ে যা লিখতে চান সেটি লিখুন। এবার আপনি যেটি লিখেছেন সেটির প্রথম প্যারা’র পরে more ট্যাগ যুক্ত করুন। এতে করে হোম পেজে আপনার পোষ্টে বাকিটুকু পড়ুন বা Continue reading অপশন আসবে। এবার ডানপাশে Categories বক্স থেকে আপনার লেখাটি যে বিষয়ের উপর সেটি সিলেক্ট করুন। যেমন: (ছবিতে দেখুন) আমি খেলা বিষয়ক একটি লেখা লিখেছি যেটা sports ক্যাটাগরীতে যুক্ত করেছি। এবার Publish বাটনে ক্লিক করুন।
Your post has been published! Visit the main site, see how it feels!
Your professional blog site is done! Also, the more you explore, the more new things you will learn. Finally, I will end this tutorial by showing how to add the sharing buttons of various social media sites including Facebook like, Twitter, Google Plus to your post.
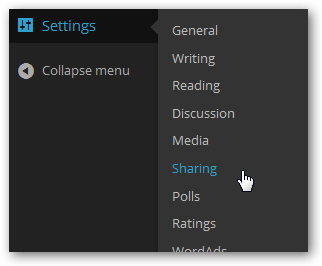
To add social site buttons, again go to Settings > Sharing option from the left column.
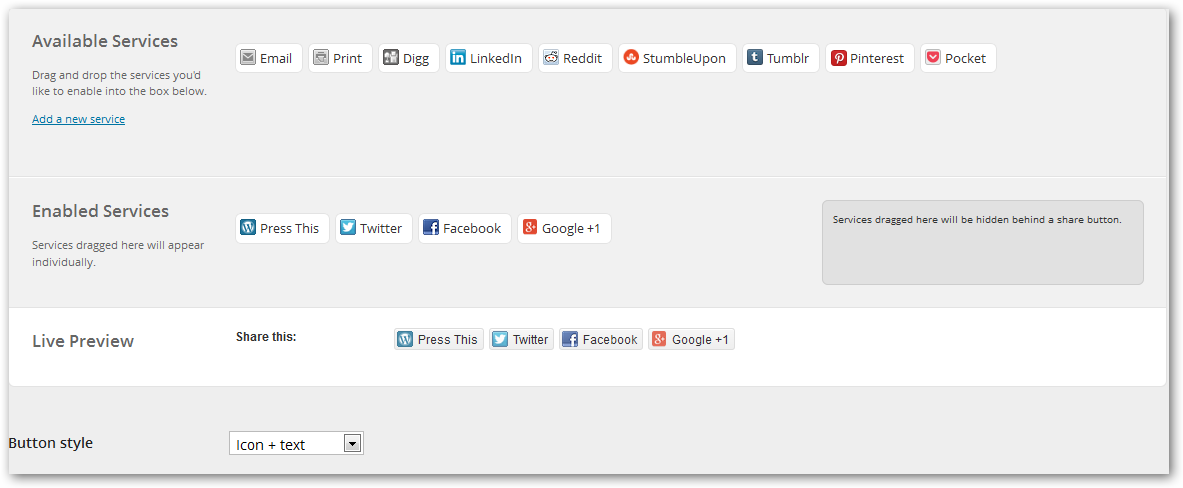
Here you will see that many buttons are given in Available Services. You can activate them by dragging them to Enabled Services. You can also see their live preview.
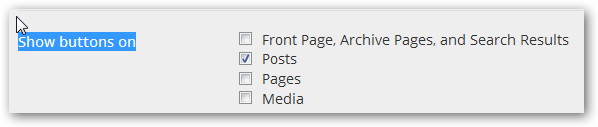
Now if you tick Show buttons on Posts, these buttons will show below your posts.
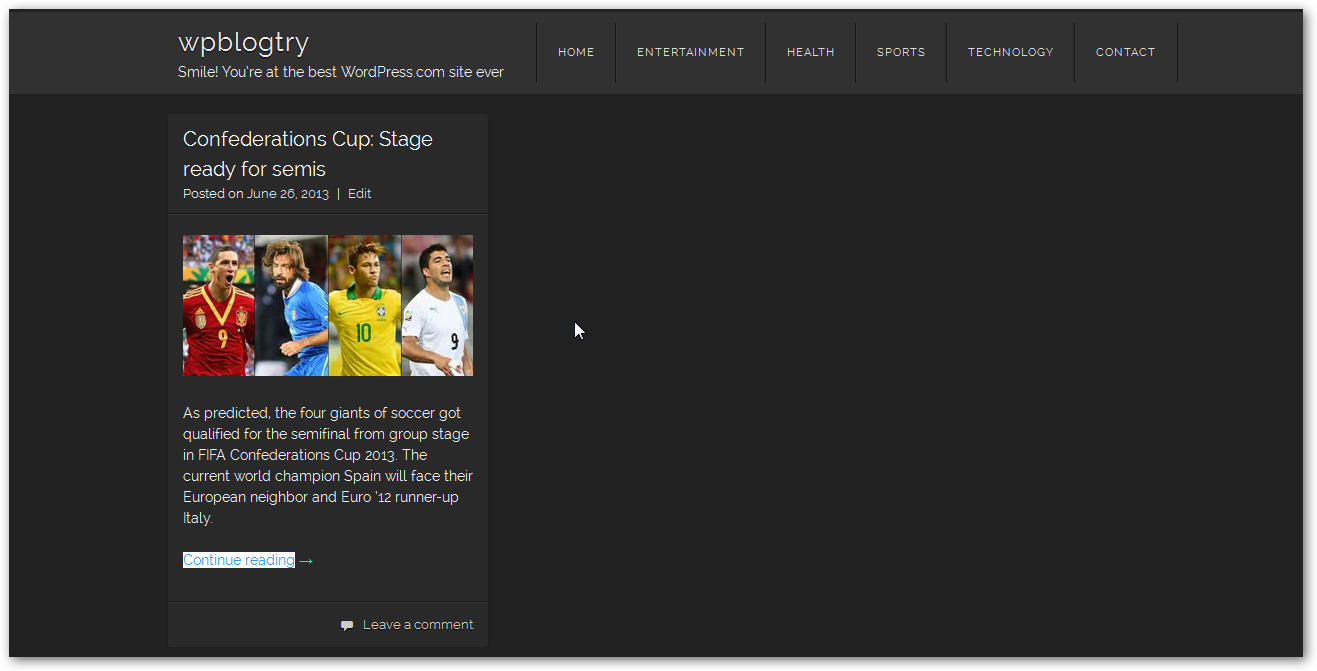
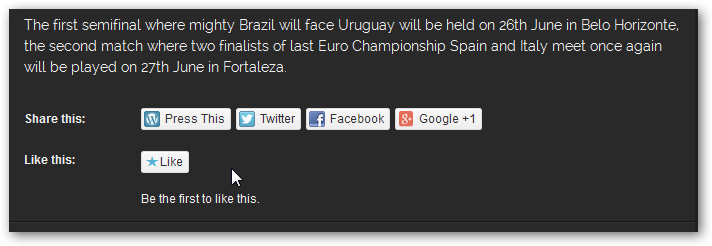
For example, one of my posts shows these sharing buttons below.
This post was last modified on জুলাই ৩০, ২০১৫ 7:14 pm
দি ঢাকা টাইমস্ ডেস্ক ॥ আপনার চারপাশে এমন অনেকেই রয়েছে, যাদের ভাবনাও অত্যন্ত নেতিবাচক। তাদের…
দি ঢাকা টাইমস্ ডেস্ক ॥ পছন্দের ওএলইডি টিভি কেনার মাধ্যমে ক্রেতাদের ঈদ আনন্দ দ্বিগুণ করতে…
দি ঢাকা টাইমস্ ডেস্ক ॥ জোভান-তটিনী অনস্ক্রিনে এবার ভালোই রসায়ন জমিয়ে তুলেছেন। তবে এবারের ঈদে…
দি ঢাকা টাইমস্ ডেস্ক ॥ ফিলিস্তিনের অবরুদ্ধ গাজা উপত্যকায় পেশাগত দায়িত্ব পালনকালে ইসরায়েলি হামলায় আল…
The Dhaka Times Desk Today is March 26, the Great Independence and National Day. 1971…
দি ঢাকা টাইমস্ ডেস্ক ॥ শুভ সকাল। বুধবার, ২৬ মার্চ ২০২৫ খৃস্টাব্দ, ১২ চৈত্র ১৪৩১…


View Comments
nice post....usefull